
Affiliate Disclaimer: This post may contain affiliate links. As an affiliate, I may earn a commission if you purchase through my links, at no extra cost to you. Please read our full disclosure for more info.
Welcome to the foundation of your blog’s traffic strategy. If you read our previous guide on why Pinterest is the best traffic source for new bloggers, you already know we aren’t waiting months for search engine rankings — we’re building a visual traffic asset.
To do that correctly, you need the right tools. The very first tool is a proper Pinterest business account.
Setting this up is 100% free. It requires no upfront budget, and you can complete the entire process in about 15 minutes.
Let’s walk through how to create your account, optimize your profile, and connect it to your WordPress blog so you can start getting your content in front of readers.
What you’ll learn in this guide
By the end of this tutorial, you’ll have a fully set‑up Pinterest business account that’s optimized for search, connected to your WordPress blog, and ready to start driving traffic. Here’s what we’re going to walk through together:
- Why a Pinterest business account is essential (and why a personal account holds you back)
- How to create your Pinterest business account from scratch
- How to choose a searchable display name that helps readers find you
- How to upload a clean, professional profile photo or logo
- How to write a keyword‑rich Pinterest bio using free AI assistance
- How to claim your WordPress website so Pinterest recognizes you as the verified owner
- What to do next to prepare your account for your first pins
This is the foundation of your Pinterest strategy — once this setup is complete, every pin you publish will have a much stronger chance of reaching the right audience.
Why your blog needs a Pinterest business account (not a personal one)
Many new bloggers start on a personal Pinterest account without realizing how limiting it is. Personal accounts don’t show outbound link analytics, which means you can’t track which pins are getting clicks or driving traffic. Without that feedback loop, you’re essentially publishing content blind — and that slows down your growth dramatically.
A Pinterest Business account fixes that instantly. You get analytics, audience insights, and the ability to optimize your profile for search so your content can actually be discovered.
A Pinterest business account is completely free to create, and it unlocks three critical features you absolutely need:
- Pinterest Analytics: See which pins are getting Saves and clicks so you can understand what your audience responds to.
- Website Claiming: Verifies that you own your blog. Once your site is claimed, every pin linking to your domain displays your profile photo, which builds trust and increases click‑through rates.
- Professional Profile Tools: Lets you set a keyword‑optimized display name and bio so ideal readers can find you through Pinterest search.
Do not skip this step. Converting to or starting a business account is the only way to treat your blog like a real, data‑driven asset.
Step 1: How to create your Pinterest business account
You have two choices here: you can either convert your existing personal account into a business account, or you can start a brand new business account from scratch.
For most beginners, I highly recommend starting a fresh, new account.
Why? Because your personal account is likely filled with recipe saves, home decor ideas, and DIY projects that have nothing to do with your blog’s actual niche.
If you are starting a finance blog, the Pinterest algorithm will get confused if your account history is full of 400 pins about bathroom remodeling.
Starting fresh gives the algorithm a clean slate to understand exactly who your target audience is.
To start, log out of your personal account, go to the Pinterest homepage, and look for the “Create a free business account” option at the bottom of the signup screen.
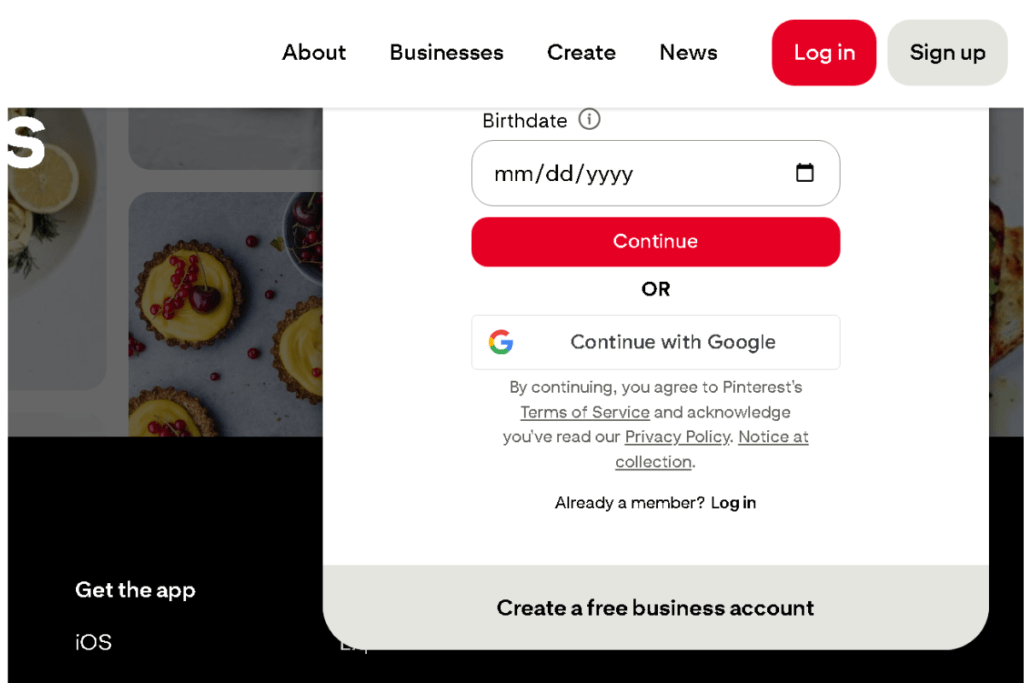
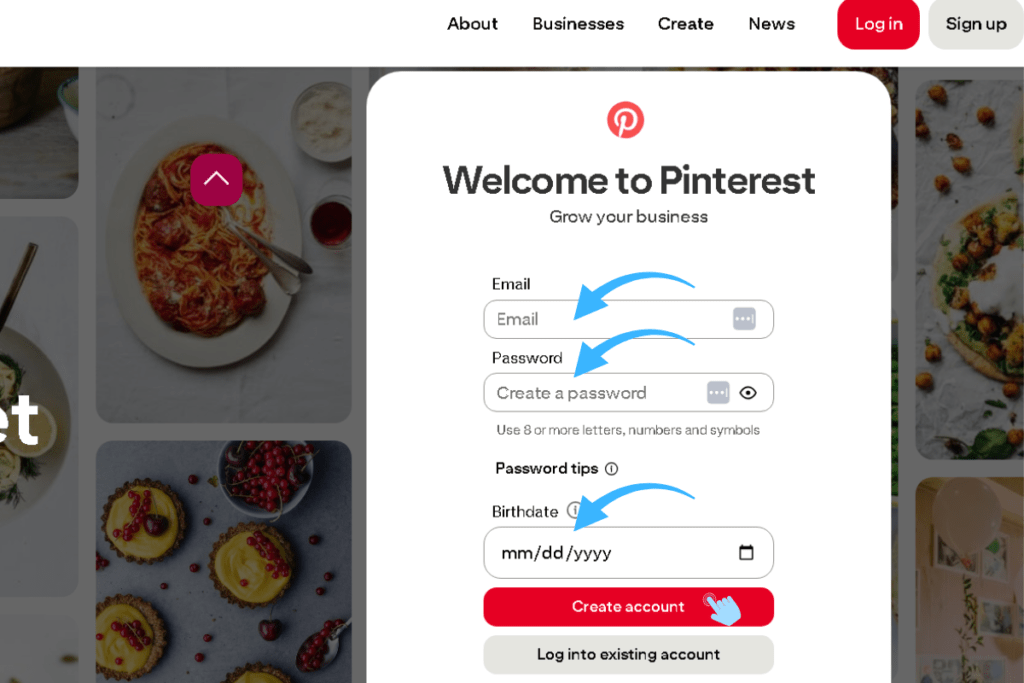
On the next screen, you will be prompted to enter your credentials. Enter your blog’s dedicated email address, choose a secure password, and enter your age.
Next, Pinterest will ask you to describe your business.
You’ll see options like Online merchant or marketplace, Service provider, Content creator, Publisher or media, Agency, or Other.
Choose the option that best matches how you use your blog or business online, then click Next to continue the setup.

After you choose your business type, Pinterest will take you to a screen titled “Tell us about your business.”
This is where you enter your basic account details so Pinterest can personalize recommendations and properly categorize your profile.
You’ll be asked for three things:
- Business name (your blog or brand name)
- Country/region
- Website URL (optional — you can check “I don’t have a website” if your blog isn’t live yet)
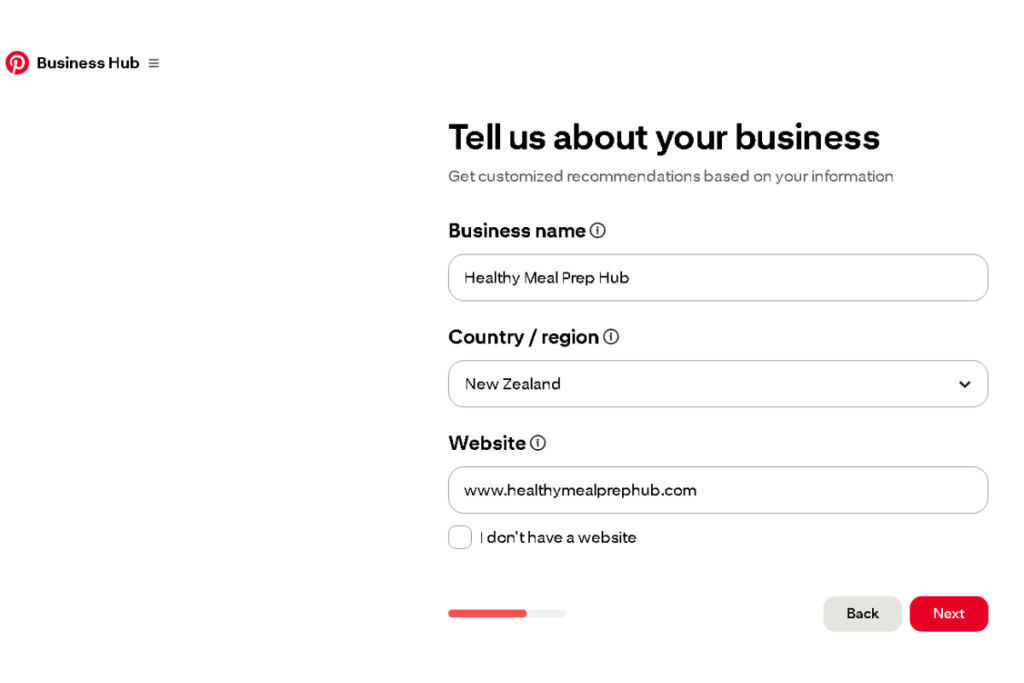
Fill these out as accurately as possible, then click Next to continue.
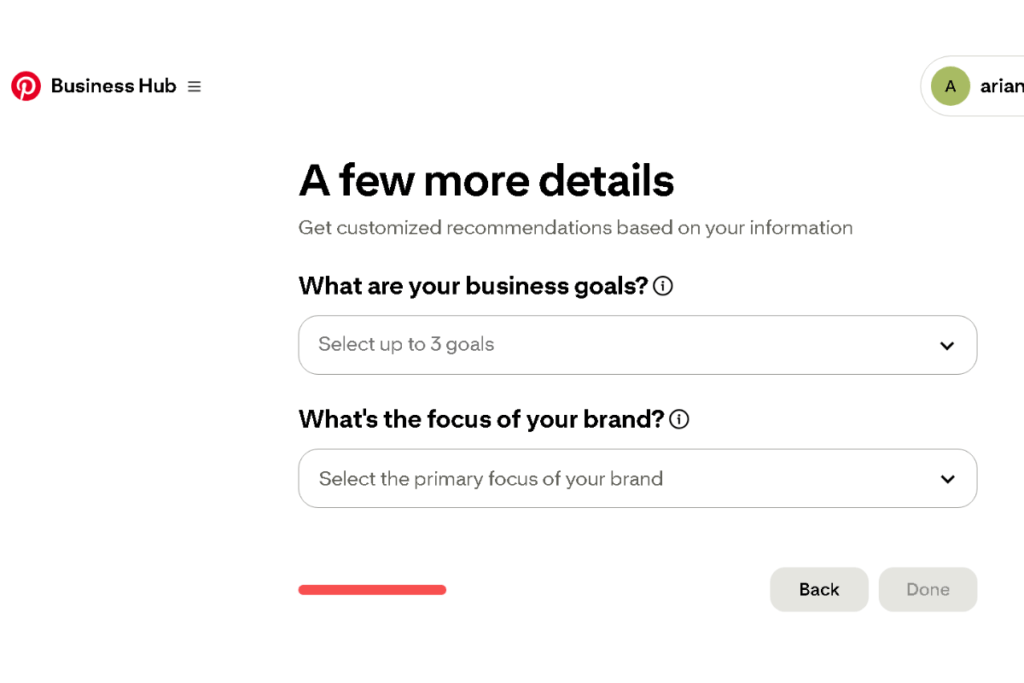
After entering your business name and website, Pinterest will show you one final screen titled “A few more details.”
This step helps Pinterest understand your goals so it can personalize recommendations and suggest features that match how you plan to use your account.
You can select up to three business goals and choose the primary focus of your brand. There are no wrong answers here — simply choose the options that best describe what you want to achieve with your blog.
Once you’ve made your selections, click Done to finish the setup.
How to access your Pinterest profile settings
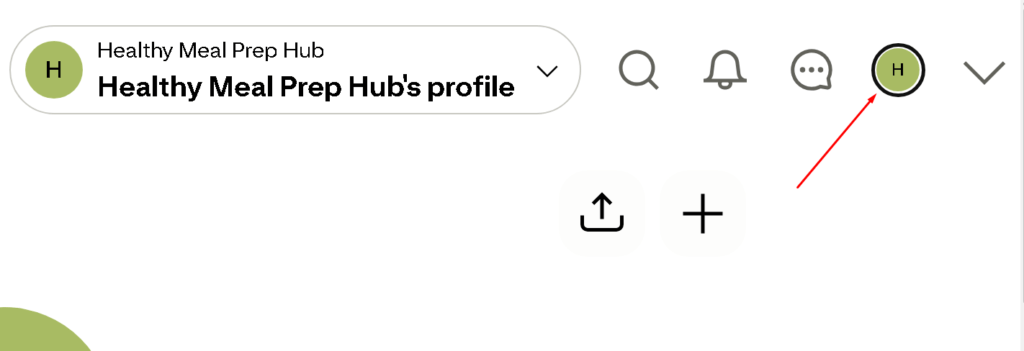
From the Pinterest Business Hub, go to the top‑right corner of the screen and click on your profile icon. This will take you to your public profile page.
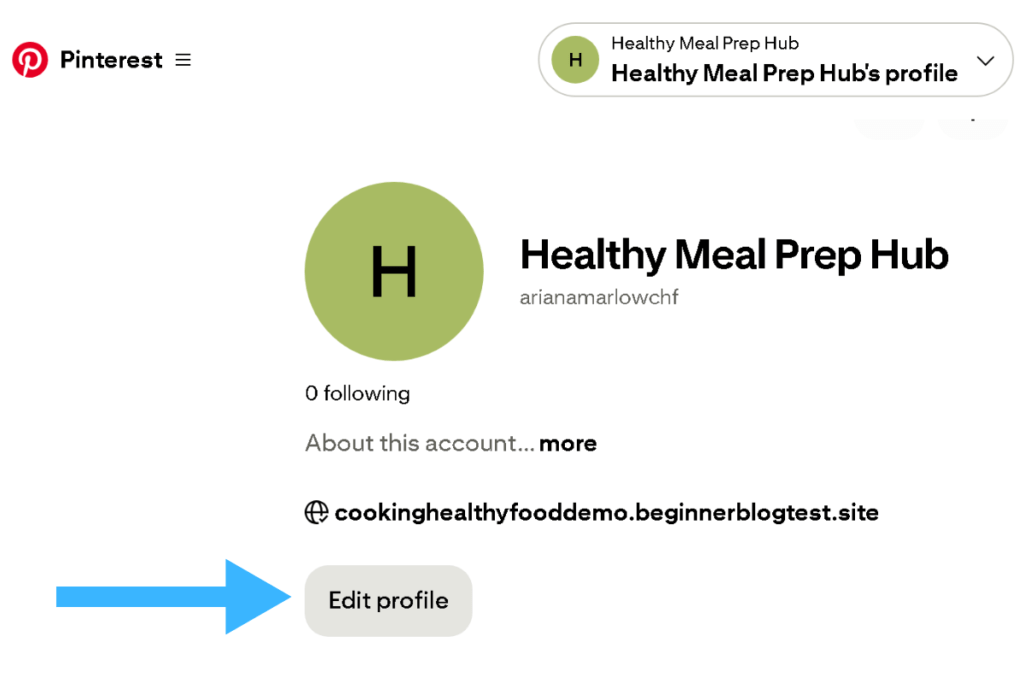
On the profile screen, click the Edit Profile button (as shown in the screenshot). This is where you’ll update your display name, bio, profile photo, and website details.
Step 2: Optimizing your profile for Pinterest search
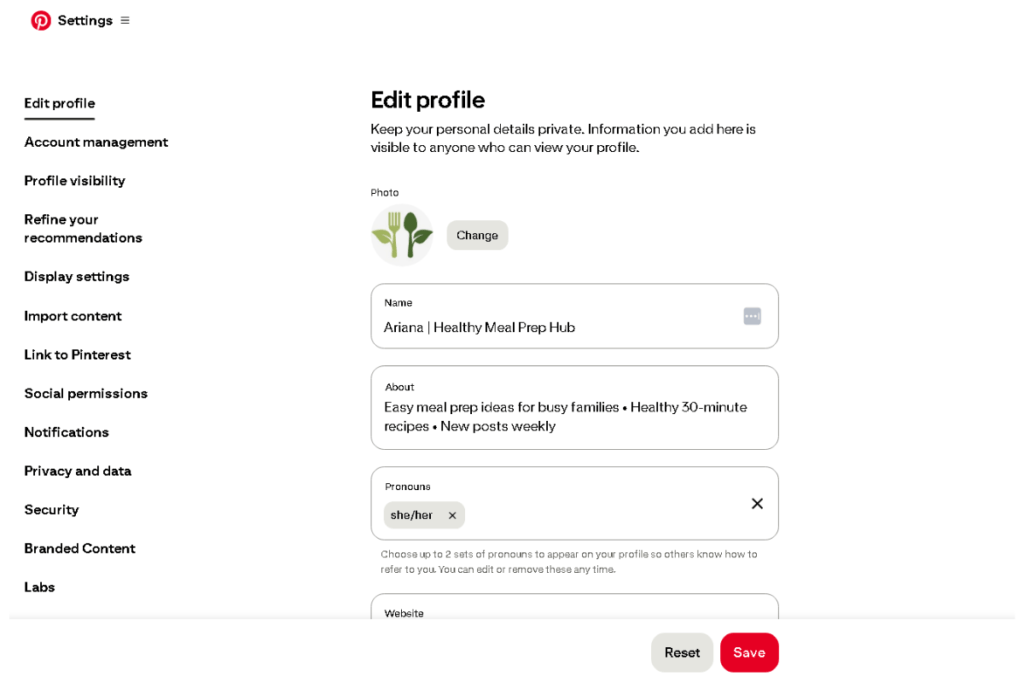
Once you’re on your Pinterest edit profile settings page, this is where we’ll optimize your account for Pinterest search so readers can discover you more easily.
These steps are evergreen and based on Pinterest’s long‑standing SEO principles, not temporary interface layouts.
1. Choosing a searchable display name
Your display name shouldn’t just be your name or your blog’s name. It needs to tell users exactly what you do.
Use this simple, evergreen formula:
[Your Name or Blog Name] | [Your Niche / Keywords]
This helps Pinterest understand your topic and increases your chances of appearing in search results.
Examples:
- Sarah | Easy Meal Prep & Healthy Recipes
- Lina | Budget Home Organization Tips
- Mark | Simple Travel Guides for Beginners
- Aisha | Easy Baking Recipes & Dessert Ideas
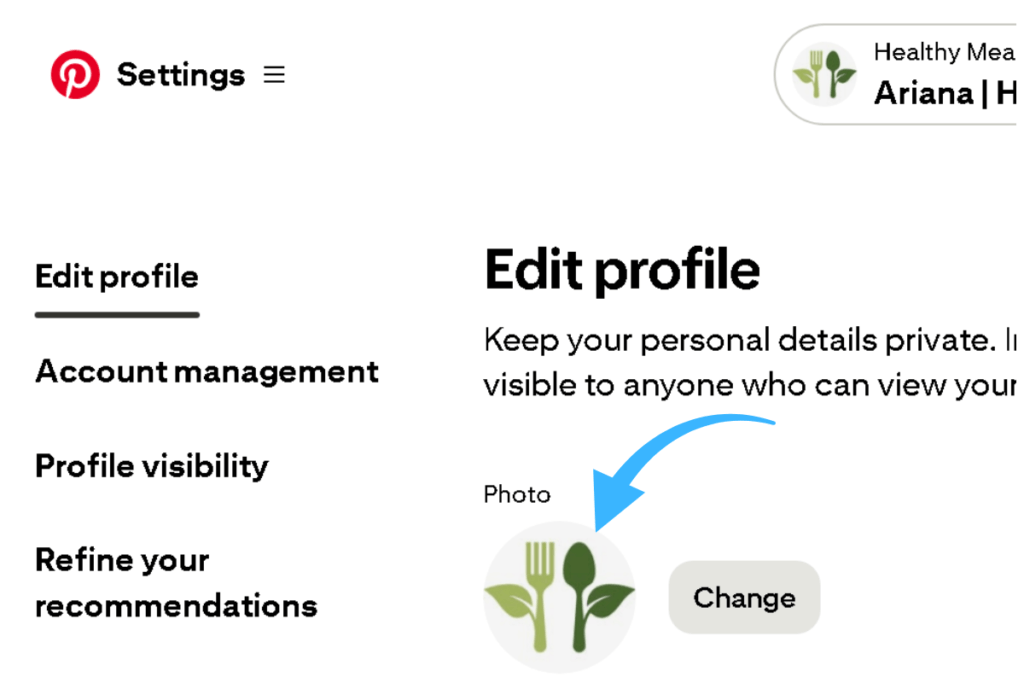
2. Uploading your blog logo or profile photo
Pinterest is a visual platform, so choose a bright, clear, high‑quality profile photo.
You can use:
- a friendly, smiling headshot (best for personal brands), or
- your blog’s logo (best for niche sites)
Click the Change button next to your profile picture and upload your image.
If you don’t have a logo yet, a simple text‑based Canva logo works perfectly and will remain evergreen.
3. Writing a keyword‑rich Pinterest bio (About field)
Your Pinterest bio is short but powerful. It should explain:
- what you do
- who you help
- your main keywords
- a simple call‑to‑action
Important evergreen rule:
Put your most important keywords and context at the very beginning.
On mobile, Pinterest truncates the bio after a limited number of characters, so the first 50–60 characters matter the most.
Example structure:
[Main keyword] • [Audience] • [Value] • [CTA]
Example bio:
Easy meal prep ideas for busy families • Healthy 30‑minute recipes • New posts weekly
🤖 AI assistance (optional but helpful)
To make writing your bio easier, you can use Google Gemini to generate ideas.
Copy‑paste prompt for Gemini:
“Act as a Pinterest marketing expert. I am setting up a new Pinterest business account for my blog. My target audience is [describe your audience]. My blog’s focus is [describe your niche]. Please write 3 options for a Pinterest bio under 160 characters. Put the most important keywords at the beginning. Use a friendly tone, include relevant Pinterest keywords, and end with a short call‑to‑action.”

Optional settings (you can safely ignore these)
Pinterest includes additional fields under Account Management, such as:
- email address
- phone number
- address
- username
- retail location toggle
These do not affect Pinterest SEO, traffic, or discoverability.
Beginners can safely skip them — they are internal account details, not public optimization fields.
This keeps your setup simple, evergreen, and focused on what actually drives results.
Step 3: How to claim your WordPress website domain
Claiming your website on Pinterest is an essential step for all bloggers. This verifies that you own your domain, helps Pinterest trust your content, improves your distribution over time, and unlocks analytics for your site. Even though it sounds technical, it’s simply a copy‑and‑paste task.
1. Getting your meta tag from Pinterest
First, we need to get a tiny piece of code (called a meta tag) from Pinterest. This code proves that you own your website.
In your Pinterest dashboard, open the menu and go to Settings. On the left‑hand sidebar, click Link to Pinterest — this is where Pinterest now manages website claiming.
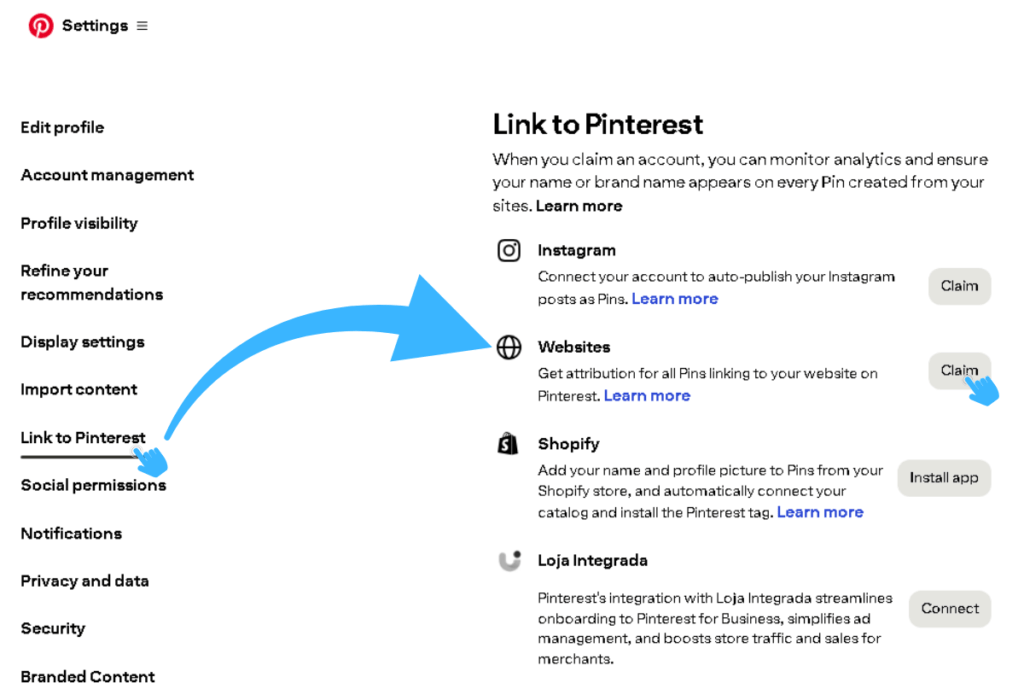
Inside this page, look for the Websites row and click the Claim button.
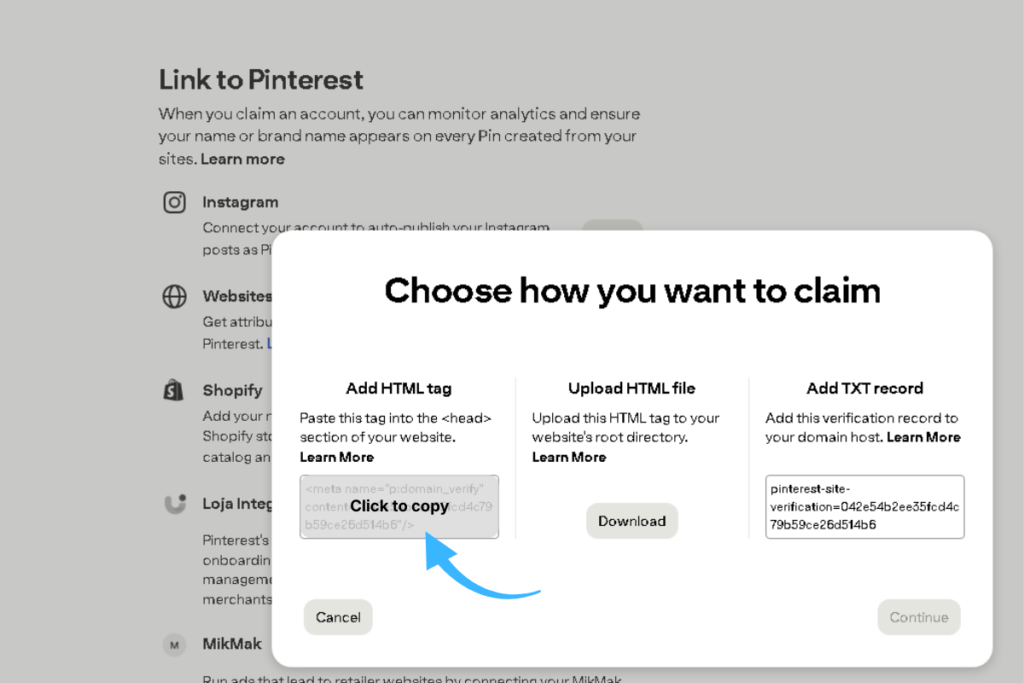
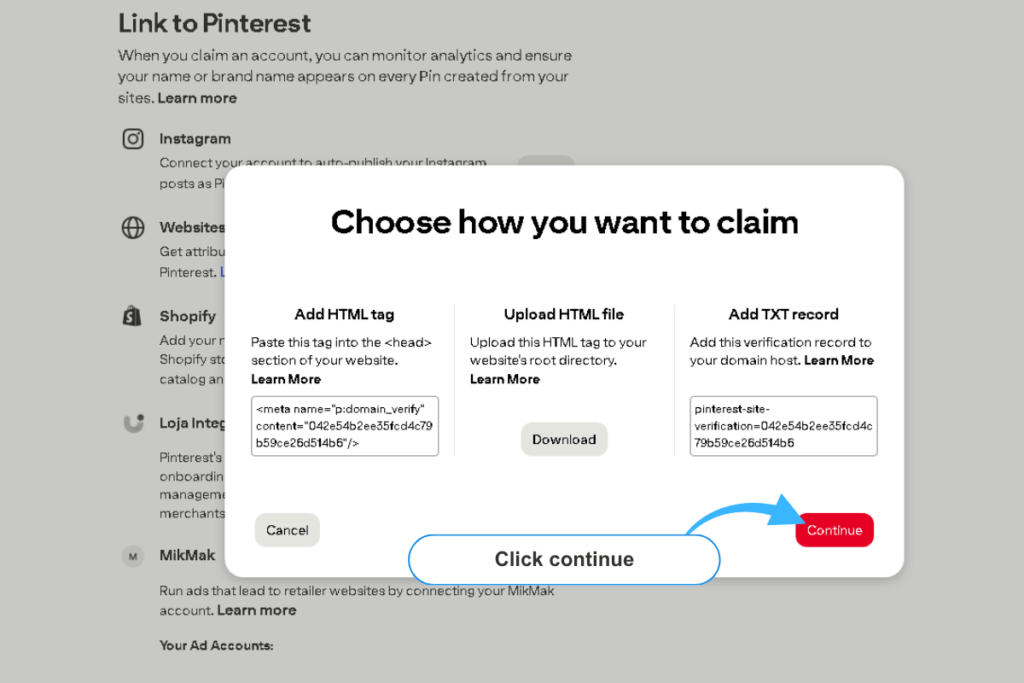
A pop‑up will appear with different verification options. Choose Add HTML tag, then copy the meta tag Pinterest provides.
2. Add the meta tag to WordPress (the safe beginner method)
To add the meta tag to your site safely, use a free plugin called WPCode Lite.
This plugin lets you insert code into your site without editing theme files, which keeps your blog safe and beginner‑friendly.
Install WPCode Lite: Plugins → Add New → Search “WPCode Lite” → Install Now → Activate.
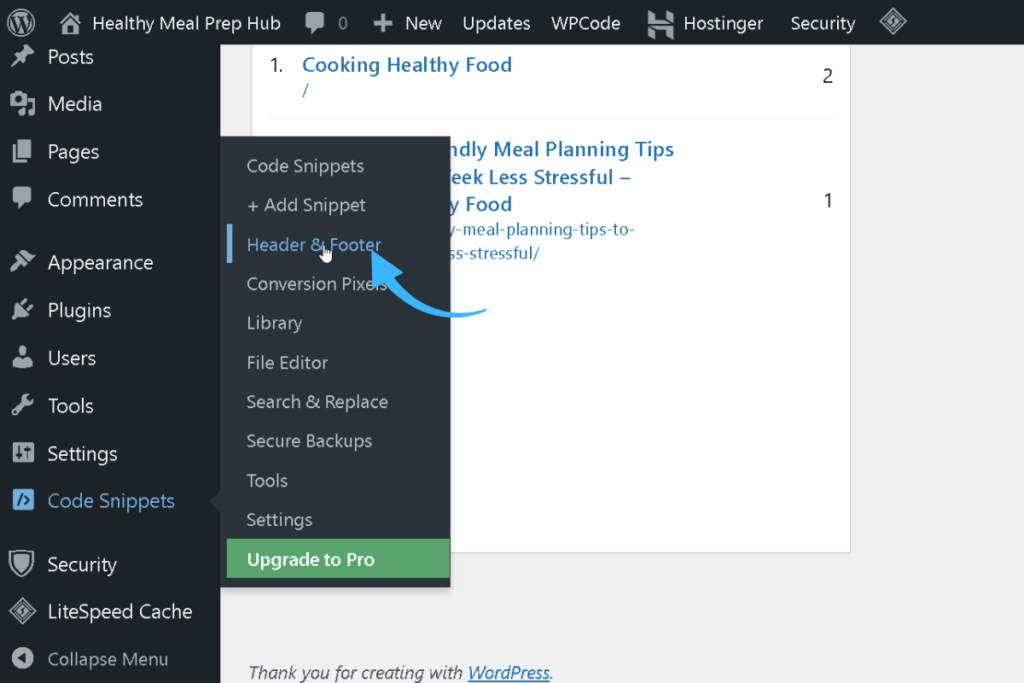
Once installed, go to Code Snippets → Header & Footer section inside WPCode Lite.
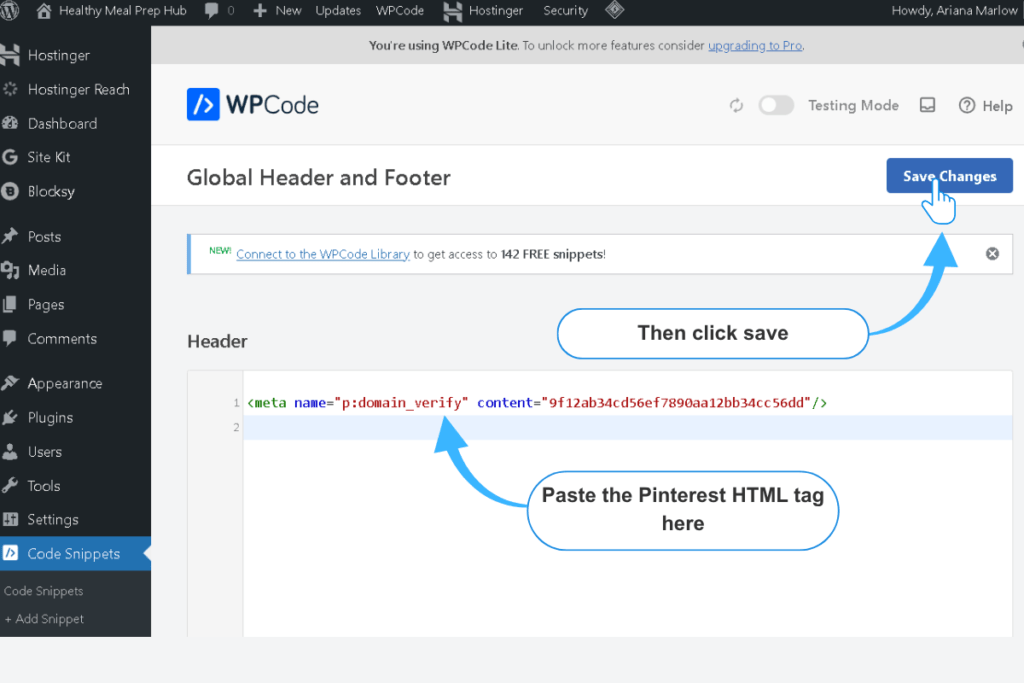
Paste the HTML tag you copied from Pinterest earlier into the Header box and save your changes.
3. Verify your website on Pinterest
Return to Pinterest, click continue button
Then enter your blog URL, and click Verify.
Pinterest usually confirms your claim within 24 hours.
You’ll know it worked when you see a green checkmark next to your website URL.

Optional settings (you can safely ignore these)
Pinterest may show additional fields such as business address, phone number, or retail location settings.
These do not affect your website claim, SEO, or traffic. Beginners can skip them entirely.
What’s next for your Pinterest strategy?
Now that your Pinterest business account is fully set up, you’re ready for the part that actually moves your blog forward — creating and publishing your first pins.
Your profile is optimized, your website is verified, and Pinterest can now recognize your content and connect it to the right audience.
Here’s what to focus on next:
- Start publishing fresh pins consistently
- Use keyword‑rich titles and descriptions
- Create multiple pin designs for each blog post
- Save your pins to relevant, niche‑specific boards
- Watch your analytics to see what your audience responds to
Pinterest growth is gradual, not instant. What matters most is that you’ve built a strong, professional foundation — and most beginners never get this far.
From here, every pin you publish helps Pinterest understand your niche and send your content to the right people.
When you’re ready to organize your first pins, your next step is simple:
set up your boards strategically.
Ready for your next step?
Your next guide walks you through exactly what to create: