Affiliate Disclaimer: This post may contain affiliate links. As an affiliate, I may earn a commission if you purchase through my links, at no extra cost to you. Please read our full disclosure for more info.
How to Set Up Web Hosting for Your Blog (Domain + SSL + WordPress in 30 Minutes)
Now that you’ve planned your blog structure and categories (from How to Choose Blog Categories That Work on Pinterest), it’s time to set up the foundation: your web hosting, domain, and WordPress installation. Most hosting providers now include one-click WordPress installation, making this process beginner-friendly.
This post walks you through choosing the right host, setting up your domain, securing your site with SSL, and getting WordPress live — all in about 30 minutes.
What You’ll Learn
- The Hosting “Truth”: Why picking the cheapest host is a death sentence for Pinterest traffic (and what to look for instead).
- Securing Your Digital Land: A step-by-step guide to registering your
.comdomain and why “brandable” beats “keyword-stuffed” every time. - The 30-Minute Install: How to use automated “One-Click” tools to get WordPress live without touching a single line of code.
- SSL & Site Security: Why that little padlock in the browser bar is non-negotiable for building trust with your first 1,000 readers.
- Avoiding the “Upsell Trap”: Which hosting add-ons are essential for a beginner and which ones are a total waste of your startup budget.
This guide is Phase 2, Step 6 of our Start Here: How to Start a Blog for Beginners (Step-by-Step Roadmap).
Why Web Hosting Matters (And Why Beginners Get It Wrong)
Many beginner bloggers make the same mistake: they choose hosting based on price alone. They find a $1.99/month deal, get excited, and sign up without considering hidden costs.
Here’s what actually happens:
The Hidden Costs Trap:
- Setup fees ($15–50) appear after checkout
- Auto-renewal at inflated prices (your 1.99/month becomes 9.99/month on renewal)
- Premium support costs extra
- Email hosting is separate
- SSL certificates cost extra (or not included)
- Bandwidth limits force upgrades
- Performance degrades as your blog grows

When something goes wrong with a $2/month host, support is slow, and the “savings” disappear. You end up switching hosts mid-way, losing search rankings and months of setup time.
The right choice: A host that balances affordability, reliability, and included features. I recommend Hostinger, which offers WordPress-optimized shared hosting at transparent pricing for beginners.

The 5-Step Web Hosting Setup Process
Step 1: Choose Your Hosting Provider
Before you click “Sign Up,” understand what you’re actually getting.
What Every Blog Needs from Web Hosting:
| Feature | Why It Matters | Beginner Budget |
|---|---|---|
| Reliable Uptime (99.9%+) | Your site stays online 24/7 | Non-negotiable |
| One-Click WordPress Install | No technical setup required | Essential |
| Free SSL Certificate | HTTPS for security and Pinterest sharing | Essential |
| Free Domain (First Year) | Saves $12/year | Nice-to-have |
| Email Hosting Included | Send emails from your domain | Recommended |
| 24/7 Support | Help when you need it | Essential |
| Unmetered Bandwidth | Grow without upgrade pressure | Recommended |
| Daily Backups | Recover if something breaks | Recommended |
HTTPS (secure connections) is essential for Pinterest sharing—pins from non-secure HTTP sites receive lower distribution.
Hosting Providers Tested for Beginners:
I tested many hosts over the years. Here’s why Hostinger stands out for beginners:
- Affordable entry price: Hostinger currently charges $1.99–$3.49/month for the first term (48-month commitment; 12-month plans run $2.99–$3.99/month, renewing at $10.99–$13.99/month, as of this writing). Visit Hostinger — Click to verify current rates, as pricing and promotions update frequently.
- Automated WordPress setup: Install WordPress through the dashboard in minutes, no coding.
- Free SSL included: Automatic activation with one-click setup; certificates auto-renew every 90 days.
- Email hosting included: Premium plan offers 2 email accounts per website; Business plan includes 5 email accounts per site (free for the first year; renewal charges apply after year one).
- WordPress-optimized: LiteSpeed caching pre-configured with strong performance benchmarks (9.5/10 network speed, 10/10 database performance).
- Live chat support: Powered by Kodee AI + human backup. Hostinger’s AI assistant Kodee responds in seconds to answer most questions (SSL setup, WordPress help, domain issues). If the AI doesn’t fully help, request a human agent anytime—they respond within minutes. Available 24/7.
- Transparent pricing: Setup fees ($4.99 for monthly plans) and renewal rates disclosed at checkout—no surprise charges, but budget for higher renewal rates after year one.
Other Reputable Options:
Bluehost — WordPress.org officially recommends Bluehost, making it a trusted choice for beginners. Currently charges $1.99/month for WordPress hosting (first year), renewing at $9.99-11.99/month depending on plan. Includes free domain (year one) and free SSL.
Bluehost’s standout feature is 24/7 phone support in addition to live chat — invaluable when you’re stuck and need immediate help. Note: Email hosting costs extra (not included like Hostinger). Visit Bluehost to verify current pricing, as promotions update frequently.
A2 Hosting — Known for “Turbo” speed servers and developer-friendly features. Shared WordPress hosting starts at $2.99/month (first year), renewing at $10.99/month. A2 offers free site migration, automatic backups, and staging environments even on basic plans.
The learning curve is steeper (uses cPanel instead of custom dashboards), making it better suited for intermediate users who prioritize speed and don’t mind a more technical interface. Visit A2 Hosting to verify current rates.
Note: Pricing varies by commitment length and active promotions. Visit each host’s site to confirm current rates, as vendors update pricing frequently.
For this guide, I’ll use Hostinger as the example. The setup process is similar across most hosts.
Step 2: Register and Choose Your Domain
Your domain is your blog’s home address on the internet. Choose wisely.
Domain Name Best Practices:
- Keep it short (12–20 characters max)
- Make it memorable (easy to spell, pronounce, remember)
- Include your niche keyword if possible (e.g., “moneymakinghacks.com” for finance)
- Avoid numbers and hyphens (harder to remember and share verbally)
- Use .com if available (most trusted, easiest to remember)
- Avoid trademarked names (legal issues later)
Example domains for different niches:
- Finance niche: moneyhackersjournal.com
- Food niche: easymealprepforwork.com
- Wellness niche: busymom-wellness.com
- Parenting niche: toddleractivitiesathome.com
How to register at Hostinger:
- Go to Hostinger.com
- Click “Hosting Plans”
- Select the Premium Plan (recommended for beginners)
- In the domain search box, enter your chosen domain name
- Check availability (Hostinger shows alternatives if your first choice is taken)
- Select your domain and click “Add to Cart”
- Hostinger automatically includes the first year free; renewal cost displays clearly
Domain registration tip: Most hosts let you add your domain later if you haven’t decided yet. You can set up hosting now and add/connect a domain in Step 3.
Step 3: Set Up Your Hosting Account & Install WordPress
Once you’ve selected your domain and hosting plan, the checkout process begins.
The Checkout Flow:
- Create your account: Email, strong password (Hostinger generates one; save it!)
- Choose your billing cycle: 12 months is standard; longer terms (24 or 48 months) save money but commit you longer
- Review the order summary: Verify domain, hosting plan, and renewal pricing
- Add optional add-ons: Skip these initially (email, backups, CDN) — they’ll be upsold heavily, but most are unnecessary for a new blog
- Enter payment information and complete checkout
- Check your email: Hostinger sends your login credentials and account confirmation
After checkout — WordPress onboarding:
Hostinger guides you through an onboarding process to set up WordPress automatically. Here’s the exact flow:
1. Click “Websites” and Select “Add website”
In your Hostinger dashboard, click “Websites” in the left navigation panel.
You’ll see the Websites page (it will be empty since this is a new account).
Click the blue “+ Add website” button (top right).
A dropdown menu appears with options:
- Hostinger Horizons
- WordPress ← Flexible customization for diverse needs
- Hostinger Website Builder
- Custom PHP/HTML website
- Node.js Web App
Click “WordPress” and proceed to the next step.
2. Create Login Details for Your WordPress Account
Screen: “Create login details for your WordPress account”
Fill in the following:
WordPress admin language: Select your language from the dropdown (default: English (United States))
WordPress admin mail: Enter the dedicated blog email address you created in the pre-launch checklist (such as yourname@yourblogname.com, yourname.blog@gmail.com, or hello.yourblogname@gmail.com). This email will be your WordPress login and will receive all WordPress notifications, updates, and blog-related messages.
Administrator password: Create a strong password that includes:
- At least one number
- At least one symbol
- At least one lowercase letter
- At least one uppercase letter
- 8–50 characters total
- Only Latin letters
The password requirements will show green checkmarks as you meet each requirement. Save this password immediately in your password manager.
Click “Next” to proceed.
3. Choose How You’d Like to Build Your Website
Screen: “Choose how you’d like to build your website”
You’ll see two options:
- Create a website with AI — Let AI build a website for you
- Pre-built websites and themes — Build a website from scratch using pre-built templates or themes
Select: “Pre-built websites and themes” (the option on the right with the radio button)
Click “Next” to proceed.
4. Skip Pre-Built Websites and Choose a WordPress Theme
Screen: “Choose a pre-built website”
You’ll see a grid of pre-built website templates for different industries.
Ignore all these templates. Instead, click the link at the bottom right that says “Use a theme instead”
A modal popup appears: “Choose a theme”
You’ll see 15+ WordPress theme options. Do NOT choose Twenty Twenty-Five, Lightning, Neve, or any other default WordPress themes.
Recommended themes for beginners:
- Blocksy (dark background with “B” logo) ← Recommended — Clean, lightweight, highly customizable, and perfect for blogs. We’ll use this throughout the guides.
- Kadence WP (alternative) — Professional, flexible, great for beginners
- Astra (alternative) — Popular, lightweight, with many pre-built demos
Select your chosen theme (preferably Blocksy) and click “Next” to proceed.
5. Enter Your Domain Name and Complete Installation
Screen: “What domain or subdomain would you like to use?”
In the “Domain name” field, enter the domain you registered when you created your Hostinger account in Step 1 (the main domain you purchased or claimed).
Once you enter your domain, the “Next” button at the bottom right will turn blue, indicating you’ve provided the required information.
Click “Next” to proceed.
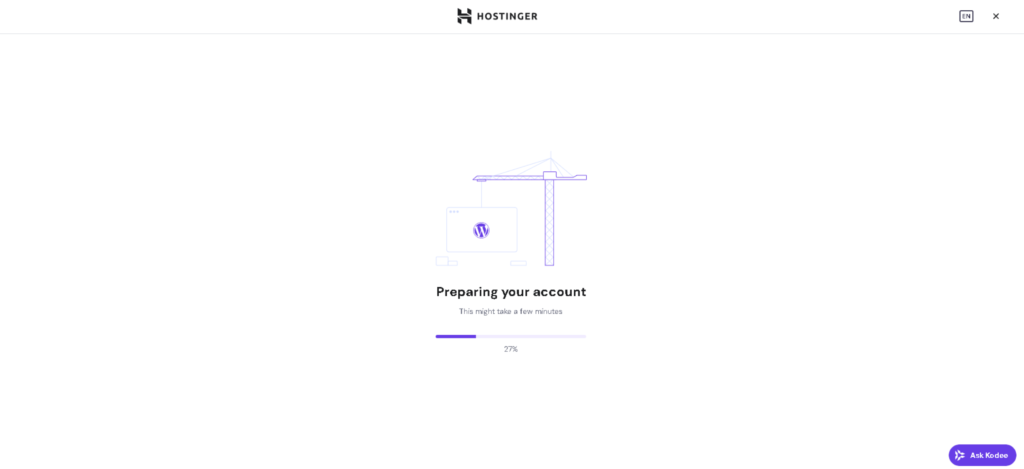
Hostinger will now install WordPress. This process takes 2–3 minutes. Do not close your browser or refresh the page while installation is running.
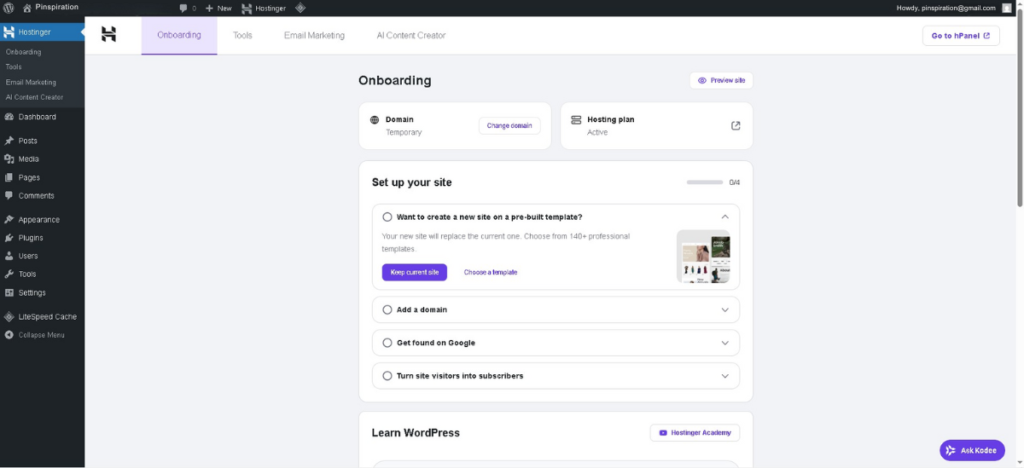
Once installation completes, Hostinger takes you to the WordPress Onboarding screen inside your WordPress admin dashboard.
You now have WordPress installed and ready to configure. The next post will guide you through essential WordPress settings and customization.
If You Get Stuck During Setup
Can’t find the right button or worried you clicked the wrong thing?
You’re not supposed to figure this alone.
- Click “Ask Kodee” — the chat bubble at the bottom right of your Hostinger screen
- Type what’s happening in simple language:
“I’m trying to install WordPress and I’m on the ‘Add website’ screen. What should I click next?” - Kodee (Hostinger’s AI assistant) replies in seconds with exact steps
- If you still feel stuck, ask Kodee to connect you to human support and a real person will take over via live chat
This alone removes 90% of the “I might break something” anxiety for you.
Step 4: Activate Your SSL Certificate (HTTPS)
Your domain needs HTTPS (secure connection) for Pinterest and reader trust. Hostinger provides free SSL certificates and installs them automatically when you add your domain.
Check if SSL is active:
Go to your blog homepage: yoursite.com
Look at the URL bar in your browser:
- HTTPS prefix (not HTTP) ✓
- Padlock icon (gray/black in most browsers) OR a tune icon (in Chrome) next to your domain ✓
- No “Not Secure” warning ✓
If all three are present: SSL is active. Your site is secure. You’re done with this step.

If SSL is NOT active (no HTTPS, no padlock, or “Not Secure” warning):
Contact Hostinger Support to install SSL for you. They can activate it in minutes:
- Live Chat in your hPanel dashboard (bottom right) — Start with Kodee (AI assistant). If you need to speak with a human agent, ask Kodee to connect you to human support.
- Support Ticket in hPanel
- Email support
Your blog is now secure. Visitors see the padlock icon (or tune icon in Chrome), and Pinterest rewards secure sites with better visibility.
Step 5: Connect Your Domain
Best Practice for Beginners: Register your domain with the same provider as your hosting (Hostinger) to avoid complications. Hostinger automatically connects domains registered in the same account — no extra steps needed.
Scenario A: Domain Registered at Hostinger (Same Account)
You’re done! Your WordPress site will be live at yoursite.com within minutes.
Scenario B: Domain Registered Elsewhere (Different Registrar)
If you registered your domain at GoDaddy, Namecheap, or another provider, you need to point it to Hostinger by updating your nameservers (technical settings that tell your domain where your hosting is located).
⚠️ This can be tricky for beginners. Instead of following complicated steps, use Hostinger’s live support — they’ll guide you in 5–10 minutes.
Contact Hostinger Support for Domain Connection
Don’t try this alone. Let the experts handle it:
- Live Chat in your hPanel dashboard (bottom right) — Ask Kodee (AI assistant) to connect you to human support
- Support Ticket in hPanel
- Email support
Tell them: “I registered my domain at [registrar name], but my hosting is at Hostinger. I need help pointing my domain to Hostinger.”
They’ll walk you through the exact steps for your registrar. It’s much faster and easier with their help.
Your WordPress site will be fully live and ready to start blogging once your domain is connected.
📋 Free Hosting Setup Checklist (Save This for Later)
If you’re the kind of person who likes to double‑check everything before hitting “Pay,” a simple checklist can calm your brain.
This downloadable checklist covers:
- Domain name ideas and availability checks
- Hosting feature checklist (uptime, SSL, email, support)
- Space to store your WordPress login URL, username, and password
- SSL verification steps (what to look for in the browser bar)
- Hostinger support contacts so you’re never stuck alone
You can print it or keep it open on your phone while you follow this guide.
Common Hosting Questions (Answered)
Q: What if I want to move my blog to a different host later?
A: You can migrate WordPress and your domain to a new host anytime. Most hosts offer free migration services. This is standard and doesn’t cost extra. Your domain stays yours — it’s not tied to any host.
Q: Do I need to worry about uptime and backups?
A: Reputable hosts (like Hostinger) guarantee 99.9% uptime and include automatic daily backups. You don’t need to do anything. Cheap hosts often lack this; that’s a real risk. Budget for reliable hosting, not the cheapest option.
Q: Can I upgrade my plan later?
A: Yes. As your blog grows, you can upgrade from Premium to Business or Cloud plans anytime. No penalty, no contract lock-in with most hosts.
Q: How many blogs can I host on one plan?
A: Most Hostinger plans allow 25–100 domains per account (depending on tier). If you start a second blog, you can add it to the same hosting account without paying twice.
Q: What’s the difference between shared hosting and managed WordPress hosting?
A: Shared hosting (like Hostinger’s standard plans) shares server resources with many sites — good for beginners, affordable. Managed WordPress hosting (like DreamHost’s DreamPress) optimizes the server only for WordPress, faster performance, higher cost. For a new blog, shared hosting is plenty.
If You Get Stuck During Hosting Setup…
Don’t spend hours troubleshooting on your own. Hostinger’s live support is available 24/7 to help with:
- SSL certificate issues (padlock not showing, HTTPS errors)
- Domain connection problems (domain not pointing to Hostinger)
- WordPress installation issues (setup failed, login problems)
- WordPress settings and configuration
- Any other hosting or technical questions
How to Contact Hostinger Live Support
Live Chat (Fastest):
- Click the chat icon (bottom right) in your hPanel dashboard
- Start with Kodee (AI assistant)
- If you need a human, ask Kodee to connect you to human support
- Average response time: 2–5 minutes
Support Ticket:
- Go to Help in your hPanel
- Click “Create Ticket”
- Describe your issue in detail
- Response time: Usually within 1–24 hours
Email Support:
- support@hostinger.com
- Response time: Usually within 24 hours
What to Tell Support
Be specific about your issue:
- SSL problem: “My site shows ‘Not Secure’ — there’s no padlock icon in the browser”
- Domain issue: “My domain is registered at [registrar], but my hosting is at Hostinger. I need help connecting them”
- WordPress problem: “I can’t log into WordPress at [yoursite.com/wp-admin]”
- General setup: “I’m a beginner and need help with the next step in WordPress setup”
The more detail you provide, the faster they can help.
No Shame in Asking for Help
Hostinger support handles hundreds of beginner questions daily. They’re there to help, and getting expert guidance is faster and safer than DIY troubleshooting.
Your WordPress blog will be live and ready to write posts within an hour with their support.
What’s Next?
You’ve now completed the critical infrastructure for your blog:
- ✅ Domain registered
- ✅ Hosting live
- ✅ WordPress installed
- ✅ SSL secured
Next, learn how to set up your WordPress theme and configure the essential WordPress settings you should change right after installing.
Key Takeaways
- Avoid the price trap: Choose hosting that balances affordability with reliability, not just the cheapest option
- Hostinger works: It includes automated WordPress installation, free SSL, free email, and 24/7 live support at beginner-friendly pricing
- SSL is non-negotiable: Always verify HTTPS and the padlock icon (gray/black) appear on your domain. If not, contact live support immediately.
- 30-minute setup is realistic: Domain → WordPress install → SSL verification can be done in under an hour with Hostinger’s automation
- Live support is your friend: For any technical issues (domain connection, SSL activation, WordPress settings), contact Hostinger’s live chat. They’ll guide you through it.
- You can migrate later: Your blog and domain aren’t locked to any host permanently. You can always move to another provider later if needed.
Ready to Turn Your Blog Into a Traffic Machine?
This foundation you’ve built is critical. Learn the complete blogging blueprint in Anastasia Blogger’s Pinterest SEO Traffic Secrets—designed for beginners who want consistent Pinterest traffic without the overwhelm.